(This article was first written in March 2009 – now most of us have Android tables laying around performing this task and much more!)
For a long time, I wanted to buy an internet radio to get access to thousands of stations from all over the world. However, it seemed the market in the US was way behind that of Europe, where (especially in the UK) you could select among many models of digital, Ethernet-equipped radios. Many of them had features such as pausing and recording the audio stream.
Aren’t you also intrigued with these novel picture frames, but could never justify the price of one, with better models reaching hundreds of dollars and lesser models not really worth buying? Picture frames were one of the best-selling gifts in 2008, with an average price of $169 for a connected photo frame (EE Times, Feb 23rd, 2009), but people are mostly confused with the device. I’ve seen a few in people’s homes being used for several weeks and then collecting dust.
Adding the ability to play music to any device seems to be more of a marketing bullet than the issue of technical difficulty. Even the GPS units now play MP3s. Soon microwave ovens will do the same while you wait for your lunch to heat up.
I believe all those units will eventually converge as the electronics built into them becomes a commodity. The prices of (small and medium-size) flat panels are sharply falling by day as the yields are improving and demand keeps growing by expanding into new markets and applications.
A little diversion: In my Linux Journal article on the voice-response, remote controlled MP3 player, I tried to combine a few existing technologies to achieve that, but the time was not ripe for the elegance I wanted to get. This time I wanted to see if a unit can be cheaply built with off-the-shelf components that can do all of the things I wanted to have in a “kitchen radio/picture frame”.
This web page explains and demonstrates building such a unit from an old spare notebook.
The unit (called a “picture frame”) currently does the following:
- Picture Frame – Uses pictures shared by the home server and randomly displays them.
- Music Player – Build a playlist, select albums or titles to play and play them either randomly or in order.
- Internet Radio – Select to listen from the list of favorite radio stations from my own database of over 6,000 stations from all over the world.
- Local weather – With the temperatures in Austin, Texas exceeding 105 this Summer, this is a valuable information.
- Local Allergy – Yeah, allergies are bad in Austin. Display the graph of current and forecast allergies.
I custom-wrote the client program since that’s the only way I could have it exactly the way I needed it to be and also have it extensible for future needs.
Materials
I was familiar with various models of older notebooks, so I found a unit on eBay whose seller listed it as having a rattling noise inside and trying to boot, but not being able to, so it was really not functional for him. That laptop had some other problems and missing things which again did not concern me, and for $75 it was a perfect bargain.
I also purchased a wireless card for that notebook which I ended up not using since after resuming from sleep, it kept taking a long time to reconnect, causing network problems. I ended up simply plugging in a network cable.
The other “large” expense was a Compact Flash drive ($45, 4Gb Crucial Lexar UDMA 300x CF) and the IDE to CF interface card for it ($35). I wanted a silent, low-power solution and a fast CF card with UDMA.
The rest of the expenses was miscellaneous hardware from Home Depot and Lowes, totaling about $30.
Putting it Together
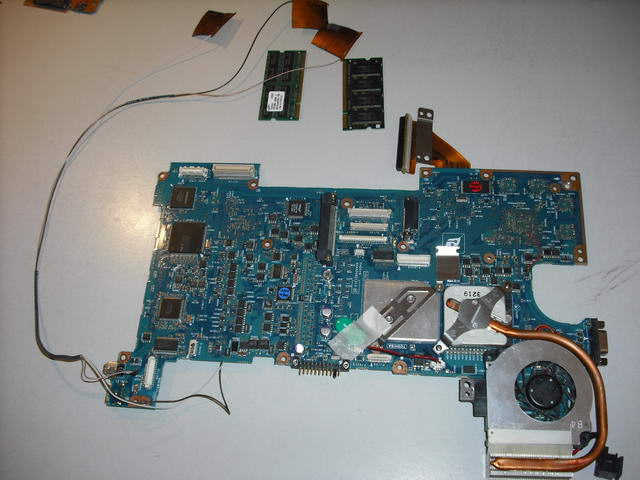
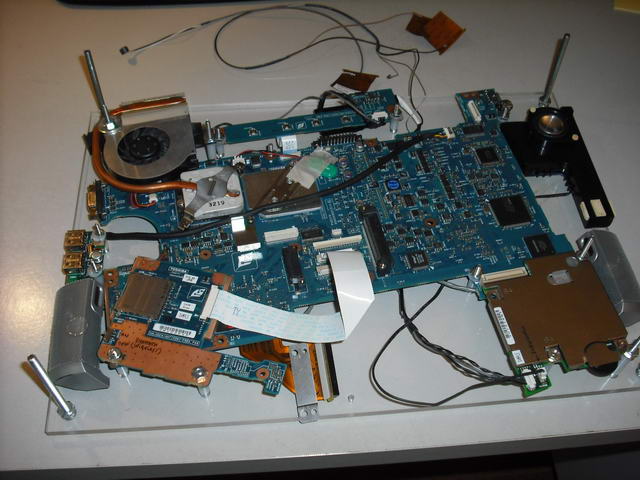
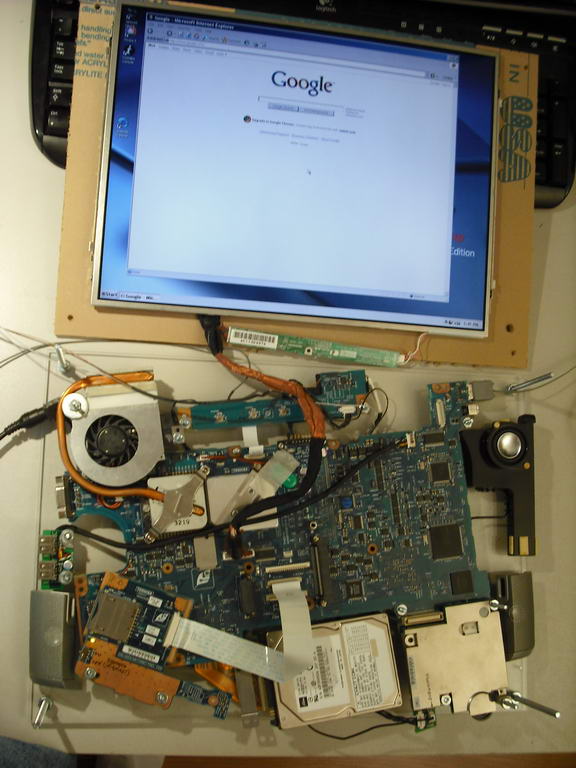
These images show gutting the notebook apart and taking only the pieces that are useful to the frame unit: motherboard, sound module, and speakers, LVDS screen, memories.
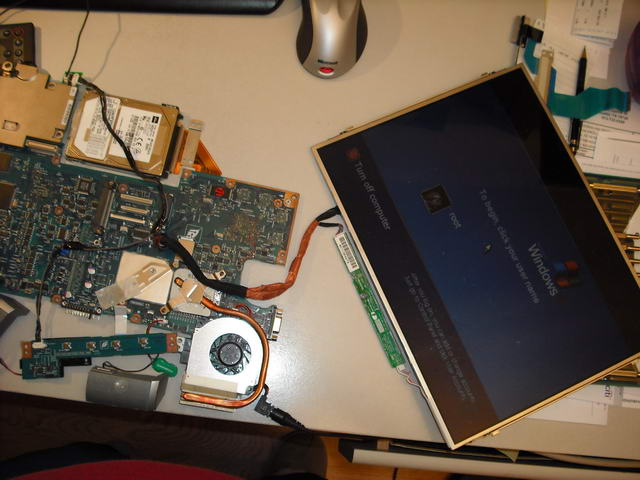
Here is a Windows XP booting up on the LVDS panel:
For the mount, I used two pieces of Plexiglas and sandwiched the guts of the notebook with some hardware. After trying several possible layouts, I marked the holes. Then using a drill-press, drilled the holes for the raisers and components as well as 4 larger holes on each corner for the support screws. (Yeah, I forgot to list the investment of a drill-press from Harbor Freights – but a man needs tools, right?!)
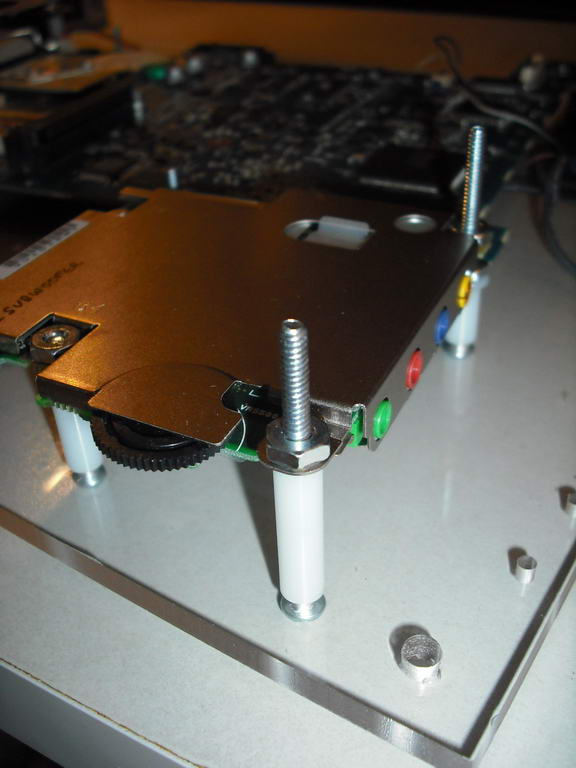
To guarantee the constant height, each component is held in place by small screws and plastic spacers, as shown in this close-up:

Still, I had to hand cut some spacers to custom-fit some of the components which mounted on top of each other and were not even with the rest.
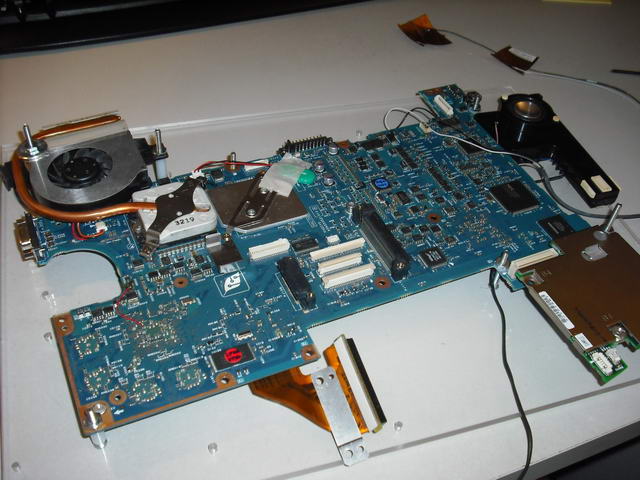
Here is a mounted motherboard, with the sound module on the right, the subwoofer at the top, and the CPU fan on the top left. Sticking out are the wires for the wireless network whose receiving pads normally get glued to the back of the panel.
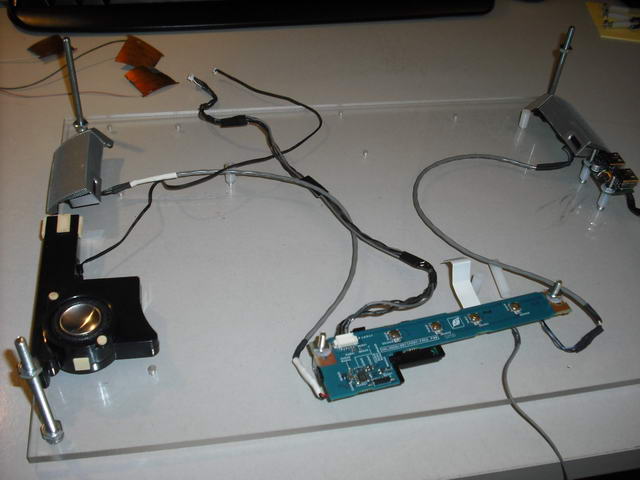
This corner contains the sound module with the volume control. I did not want to clutter the software interface with the sound volume – I wanted to use the physical volume control, so I positioned it to stick out from the back of the frame. I was about to set the sound level to around 80% in software and let the volume dial do the volume control. Conveniently, there are also jacks for the line-in, line-out located right next to it, which I did not plan on using right now, but they may come in handy in some future applications.
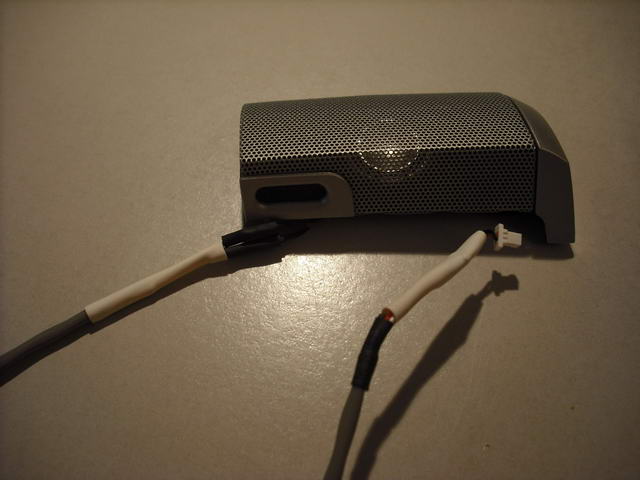
Since the wires for each speaker were too short, I had to extend them. I found a few old CD ROM cables that used to carry audio, so I cut them and soldered them as extensions:
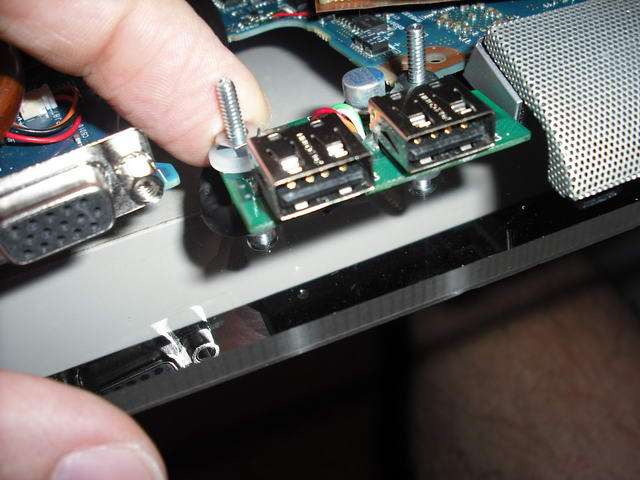
I needed USB connectors right off the side of the unit so that I can plug in a wireless mouse and possibly other peripherals. Initially, I needed to use the external keyboard until everything is set up. In the future, I could add the support of getting images from a USB drive or something like that. Keeps the options open.
These are pretty much all components mounted – it ended up a bit crowded.
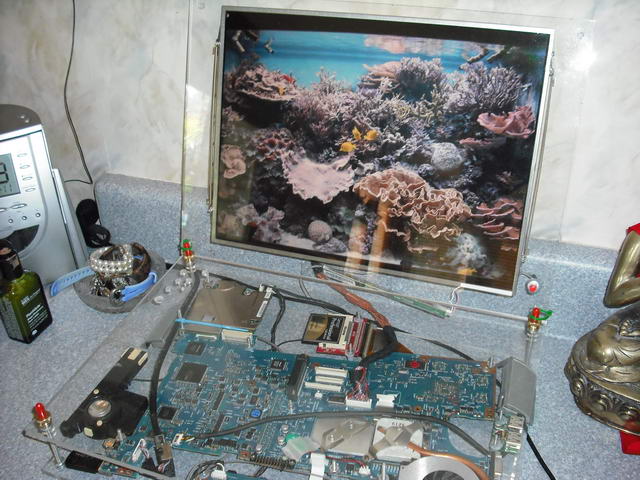
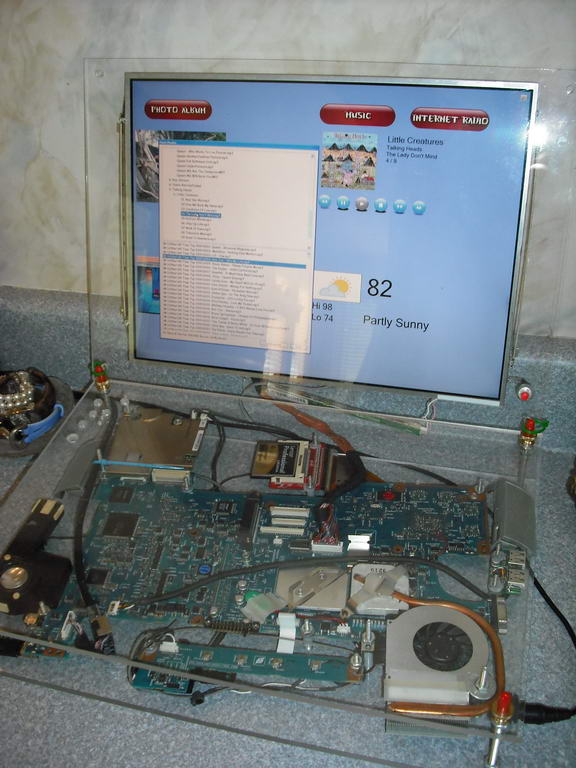
Here is it again making sure that it all works while setting up. It does look busy, but this is actually the bottom of the frame; it’s turned upside down and around for the final assembly.
It still has a hard disk plugged in. There was much tweaking involved, but in the nutshell, once all the drivers were installed, I configured and installed the software, and then made the image and copied it onto the Compact Flash card.
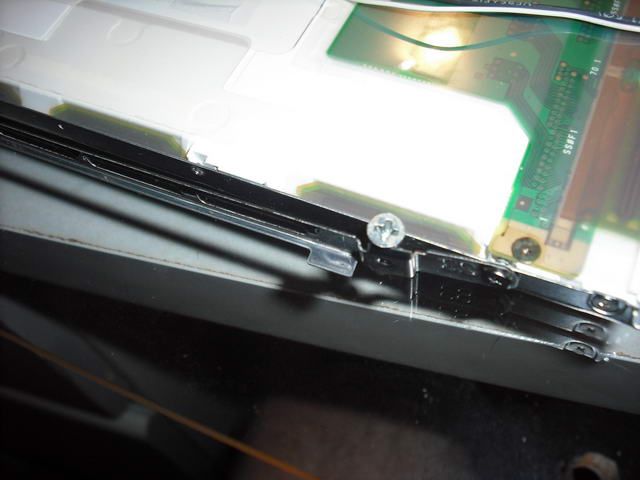
Mounting the panel was a challenge. First I tried using the double edge tape around the edges. It did not stick strong enough and suddenly the panel would just fall down when set upright. Then I noticed the tiny metal brackets on the sides of the panel. They did not have any holes in them and I believe they were used to hold the panel firmly by the plastic enclosure. I drilled very small holes on the acrylic and then used tiny screws right in between the panel and the brackets, screwing it into the Plexiglas. It worked! The assembly now seemed to be very strong.
Another problem I had with an on/off (push) button. I bought a few sizes at Fry’s, but none would work or mount exactly to what I had in mind. The Plexiglas was too thick and the button screw did not quite grab the thread. The largest push-button was reaching, but it was simply ugly. Finally, I opted for a smaller button and used a good measure of hot glue on the other side to hold it in place. I am not happy with this particular design since you may feel it’s moving just a bit when you press it and you’d like to hold it from the back while doing so. Here is a final picture of the frame:
Notice I’ve got brass screws for the 4 main corners and then red rubber protector tips pushed over the excess of each screw. I found that hardware at Lowes. I really like the final look of the assembly! There are also extra holes drilled in the top-left corner. They are artistic expressions. (Well, they started as one wrongly drilled hole..)
Finally…
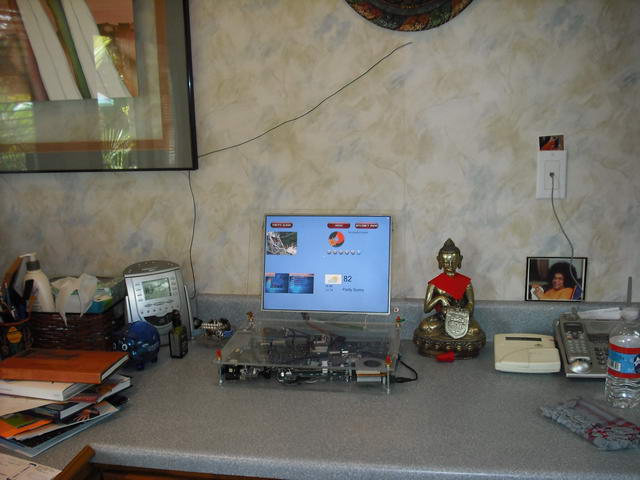
This image shows the final unit sitting on our kitchen counter.
Another close-up with the software running:
The unit is always ready to be quickly resumed from suspend and within a few seconds, it shows the user interface. From there you can browse the music selection, listen to the radio or see the pictures. It sits in a common, busy, and prominent place in the house so when used as a picture frame, as pictures are changing, it is very eye-catching. Sometimes we just stand there and look at our last 15 years of pictures being shown at random. (The slide show toggles into the whole screen if you click on an image; otherwise, a large digital clock shows up after a few minutes of inactivity)
The flat surface we also use to stack mail and stuff, so it’s really part of the kitchen counter now. (It would be really neat to be able to extend the LVDS cable and have the unit hidden under the counter so only the flat panel hangs on the wall…)
Software
I decided on using XP since I could quite easily write my application in C#, and I know the power management drivers are supplied by the vendor. I used XP Lite to trim down the OS to a bare minimum, stripping down components in order to comfortably fit them onto a 4Gb flashcard. The other reason for heavy trimming was to get rid of all unnecessary services and drivers (and XP comes with a lot of that!).
After everything was set up and working from a hard disk, I backed up a partition and copied it onto a bootable CF card plugged into an IDE to CF adapter. However, you cannot just copy a Windows partition (using Ghost) and expect it to boot, you need to do these steps:
Using an installation XP CD, boot into the recovery console and type:
ATTRIB -r-h-s C:\BOOT.INI
DEL C:\BOOT.INI
BOOTCFG /rebuild
Enter Load Identifier: XP
Enter OS Load Options: /fastdetect
FIXBOOT
This will make a new copy of the OS bootable.
Since I have a server running 24/7 in my house, I did not care to keep any of the media on this machine, since everything was already on the server (music, pictures). As it’s designed now, one piece of software runs on the server (I call it “indexer”) and scans the media files creating an XML index file which I share through a shared folder.
The Frame software itself reads all the XML files and the media files they point to as they are needed. For music and radio, you can create playlists by dragging and dropping albums or clusters of items. Since there is no keyboard, I put special attention to the ease of the UI and I believe I have succeeded since my wife could use it without much training 🙂 The GUI UI ended up simple and very intuitive, and yet it does everything it was supposed to do.
I have a list of about 6000 radio stations from all over the world. It is hard to collect such a list, and indeed I could not find it anywhere on the Internet (for free, that is). So, I wrote a set of Perl scripts that harvest some of the best internet radio portals. The scripts would issue HTTP requests and then parse the result, stashing away information such as different URLs to the stream, optional logo picture of a station, name, and description, genre. Some of the portals were easy to do: they listed stations by their ID which I would simply query from 1 to 10000 or so. I had those scripts running for weeks from the server, 24/7, and collected the results. Some portals stopped talking to me when they figured out I was harvesting their data, but in the end, I got a very nice list.
I wrote some other scripts/software that would work on that data and created a master XML list of stations for the Frame to use.
I already mentioned a digital clock that kicks in if you are not displaying images full screen. I found a free one here and installed it as a screen saver. Then I added some C# code to control it since only the application knew when it is all right for it to kick in.
For creating images from the text, this site was extremely useful. I used it to create those big buttons.
Finally, this is the snapshot of the app, (with Marilyn Monroe happily helping out):
And the settings menu (a little toolset button on the top-right corner):
Conclusion and Lessons Learned
Format the storage (Compact Flash in this case) with the FAT32 file system, not NTFS!
The latter one does random disk accesses to various hidden and virtual files such as C:\$tmp as part of the complex file system housekeeping. There is no way to turn this off and, while it can be minimized, it still unnecessarily taxes the CF card.
Have a secondary solution for networking.
It turned out the wireless takes really long time to reconnect after a resume (which may be due to this specific system/card?) I ended up waiting for the wireless card for almost a month from an eBay purchase and at the end not using it but simply connecting to a network cable; it runs along the power cable, so it’s not that bad.
Do more real-world tests with the system before committing to it.
I wanted to have a vertical-standing picture-frame-looking system. Well, the thermal cooling on that motherboard would simply not do the job when mounted vertically! The CPU temperature would not dissipate and the fan kept working at the full speed (the cooling rig was even too hot to the touch!) When placed horizontally, the cooling worked fine. I had to make a last-minute design change to lay the whole thing horizontally and only mount the LVDS panel vertically. So now, it does look like a laptop it started with, but at least it is not thermally compromised.
Use screws, not glue or tape.
Originally I meant to use double-sticky tape to tape the LVDS panel to the acrylic giving it a clean look. That worked. Well, for two days, at least; the panel went down as the tape simply detached. Ended up using small screws jammed between the outer edges of a panel and slim panel metal brackets that just happen to be there. The screws are very short so they don’t poke out from the front face of the acrylic and the mount is very tight and firm. I am very happy with how that one turned out.
Mouse or touch-screen?
Touch screen would add up a cost and it would be difficult to find one that is as large as this panel anyways. Wireless mouse purchased at Fry’s for $14 worked as fine. Tuck it away when not in use.
Operating System considerations
I used nLite to create a set of custom XP installations and kept trying them inside a VMWare box until I was happy with the setup. nLite would make an ISO image which I would use to do a test install in VMWare. Some things still needed a real (target) system: for example, testing device drivers, power management, and suspend/resume. Once everything seemed all right I copied the OS partition onto the CF card and booted off it. It all fitted nicely within 4Gb CF with plenty of space to spare! (Although it would not fit into 2Gb)
Run FileMon to watch what’s happening
Just when you think everything is set up nicely and there are no unnecessary disk accesses to ruin your CF card in the long run, there is something causing the machine to stutter or occasionally (but regularly) access the drive. (The CF to IDE adapter I bought has a little LED showing the access.) Perhaps a poorly written system control from a notebook vendor that you really don’t need (an Fn-key handler while you don’t have a keyboard or something like that). FileMon will tell you who is still not cooperating and you can remove the driver or a component.
Be prepared for maintenance
It’s never completely done! The software will show bugs once in a while; friends will give comments which you want to address or they will have a cool suggestion and you will want to implement it. More importantly, while using it on a daily basis there will be subtle things you wish it would do, so you’d go ahead and implement them.
Let it run for a while on an HDD before moving it to CF
Run the .NET application on an HDD the very first time for .NET to compile it. Also, I’ve found out there are a few other things that the XP wants to do in the background on a new system, so let it do all of it on an HDD, not on the CF card due to a limited number of writes that the compact flash can perform in the long run.
Issue of having a CPU cooling fan
Having a CPU/GPU fan is not that bad as some DIY postings state. If you set the power management right, the fan rarely turns on. The software I am running is not that CPU intensive. The main problem was to find that performance balance between the Intel SpeedStep and the OEM custom power management tools.
Solid-state is fantastic!!!
I love having a UDMA (300x) CF card instead of a notebook drive: boot times are extremely fast and there is that zapping silence while accessing the drive. I compared the performance and the random access time of 0.4 ms is mindboggling (compared to ~16ms for the platter drive). The average read/write profile is flat at 41 Mb/s for all the sectors. My notebook drive peaks at 35 Mb/s for outer tracks and then slows down to half that value as less information could be stored on the inner tracks.
The unit can still be improved, but at this point, it does what it was created to do; and it does it well. If I were to do it again, I would try to make it slimmer in order to put it on the wall. I would also probably just go ahead and purchase a touch screen. These screens can be mounted in front of the panel – they come with a USB interface and from the software perspective fully mimic the mouse.
Or perhaps by that time, some vendor will figure out there is a market out there for such devices and will make one for a reasonable price.
Comments or suggestions? You can email me at “gdevic @ yahoo.com”