Before placing (expensive) transparency into a laser printer, I do several test prints using regular paper.
When you print a transparency mask always invert the TOP layer so that the ink die is close to a board when sandwiched and the thicknesses of a transparency foil are not in the way => print with MIRROR option checked.
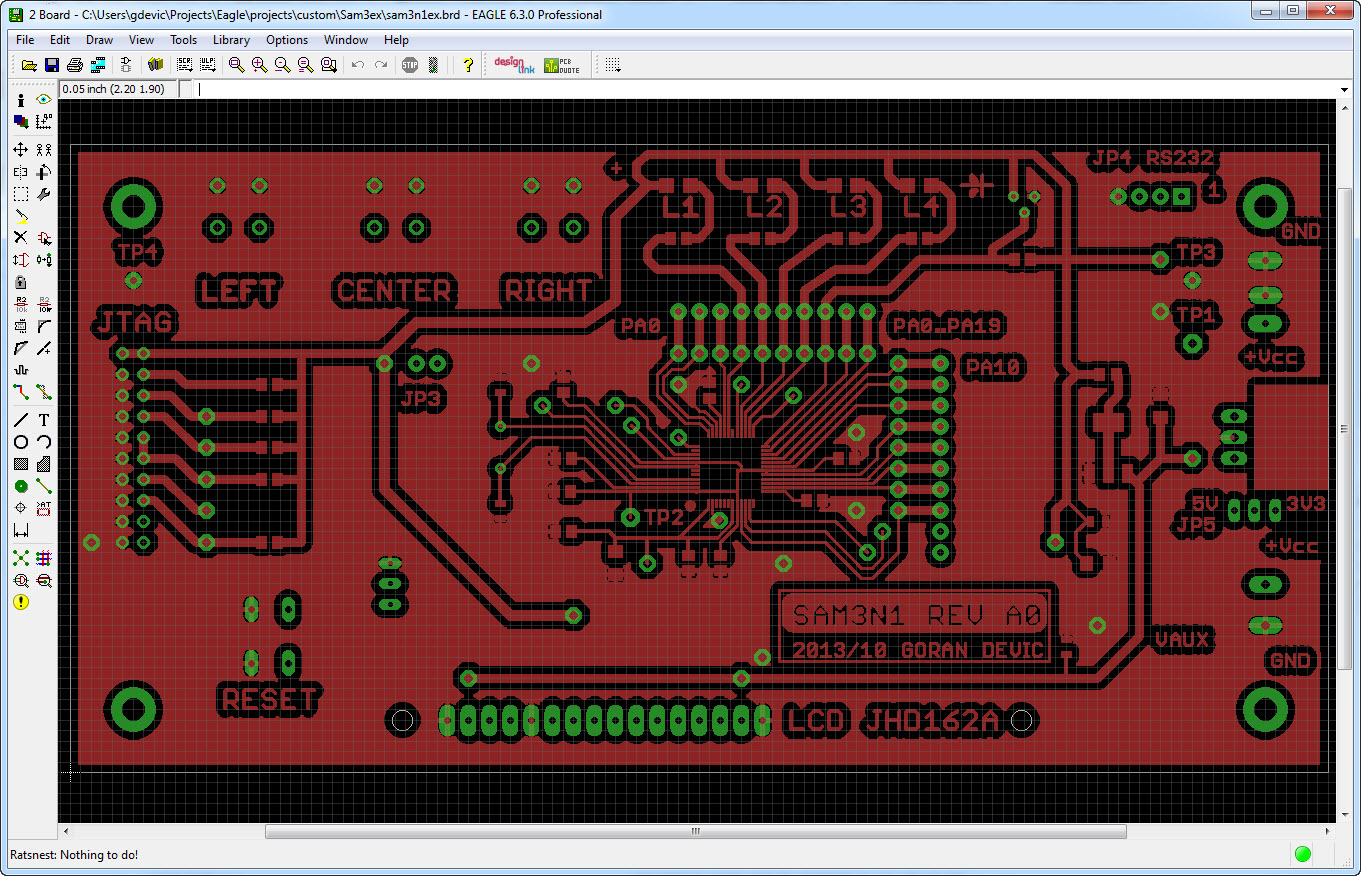
Double-sided
TOP: select (1) Top, (17) Pads, (18) Vias, (20) Dimension and MIRROR option
BOTTOM: select (2) Bottom, (17) Pads, (18) Vias, (20) Dimension. Do not print with MIRROR.
Single-sided
BOTTOM: select (2) Bottom, (17) Pads, (18) Vias, (20) Dimension. Do not print with MIRROR.
Don’t forget to do the ground pour before the printing! The ground pour will flood selected signals (usually ground) over empty space on the board.
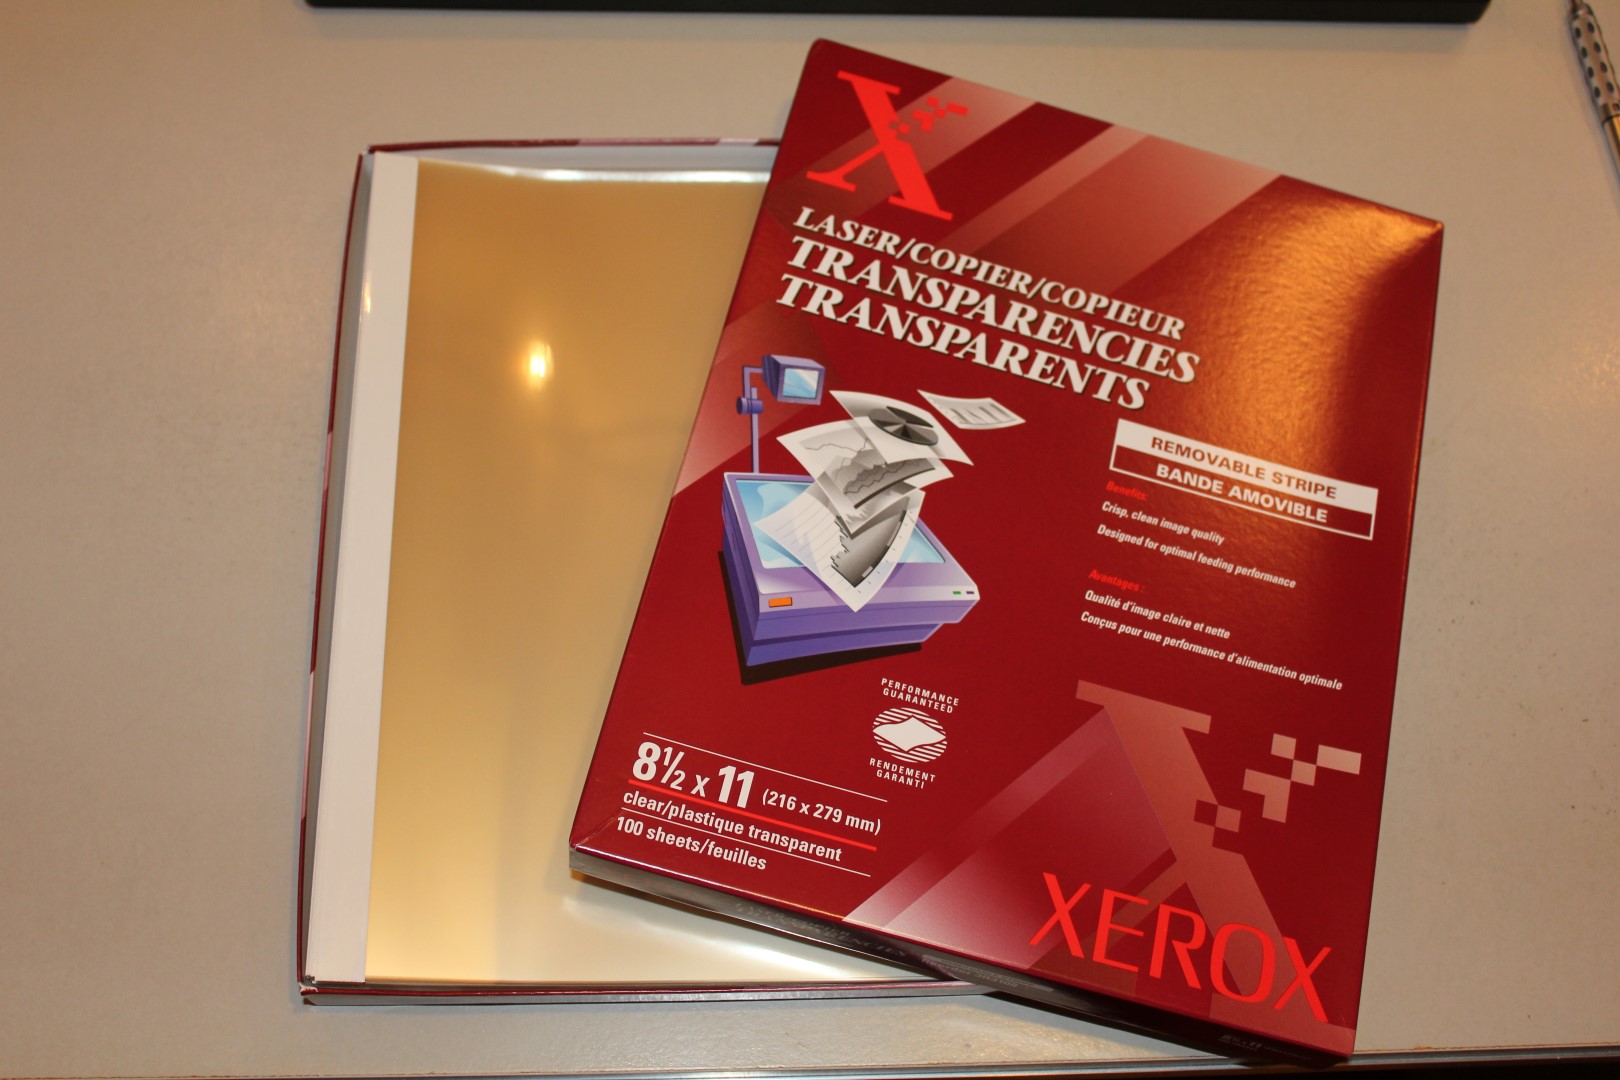
I use a reasonably good home laser printer (HP LaserJet 1022). I have tried several kinds of transparencies: more expensive MG brand purchased at Fry’s and designed especially for printing PCB layouts did not impress me and I didn’t think they justified their higher price as I was getting equally good results with other generic transparencies for laser printers.
There are several kinds of transparencies. Using the wrong kind can melt the printer drum and you may have a costly repair. In general, if you have a monochrome laser printer, use only transparencies designed for black and white lasers or copiers. Color laser printers use higher temperatures to melt the toner and you have to use transparencies for color laser printers.
I was lucky to find on eBay a box of 100 B/W transparencies for $13.50:
The biggest issue to be aware of is that transparencies slightly stretch if you run them through a printer for the second (and third!?) time – images already on it (printed in previous passes) will be stretched. The stretch was significant: about 1mm for 6” in length. This was even while using expensive MG sheets which are advertised to be “heat stabilized”. Go figure. Perhaps somebody could explain what that term actually means. If that simply means they will not stretch during the very first pass, it’s a marketing bluff since none of the 5 or 6 cheaper generic sets of transparencies I had tried in the past stretched either.
Eventually, I learned to print each image on the top center (through Eagle), print a sheet, then cut it and insert the same sheet (which is now shorter) for the next print. These things are expensive and you don’t want to waste them. Alternatively, you could arrange all your prints through Gimp into one sheet. I have another post describing that method.
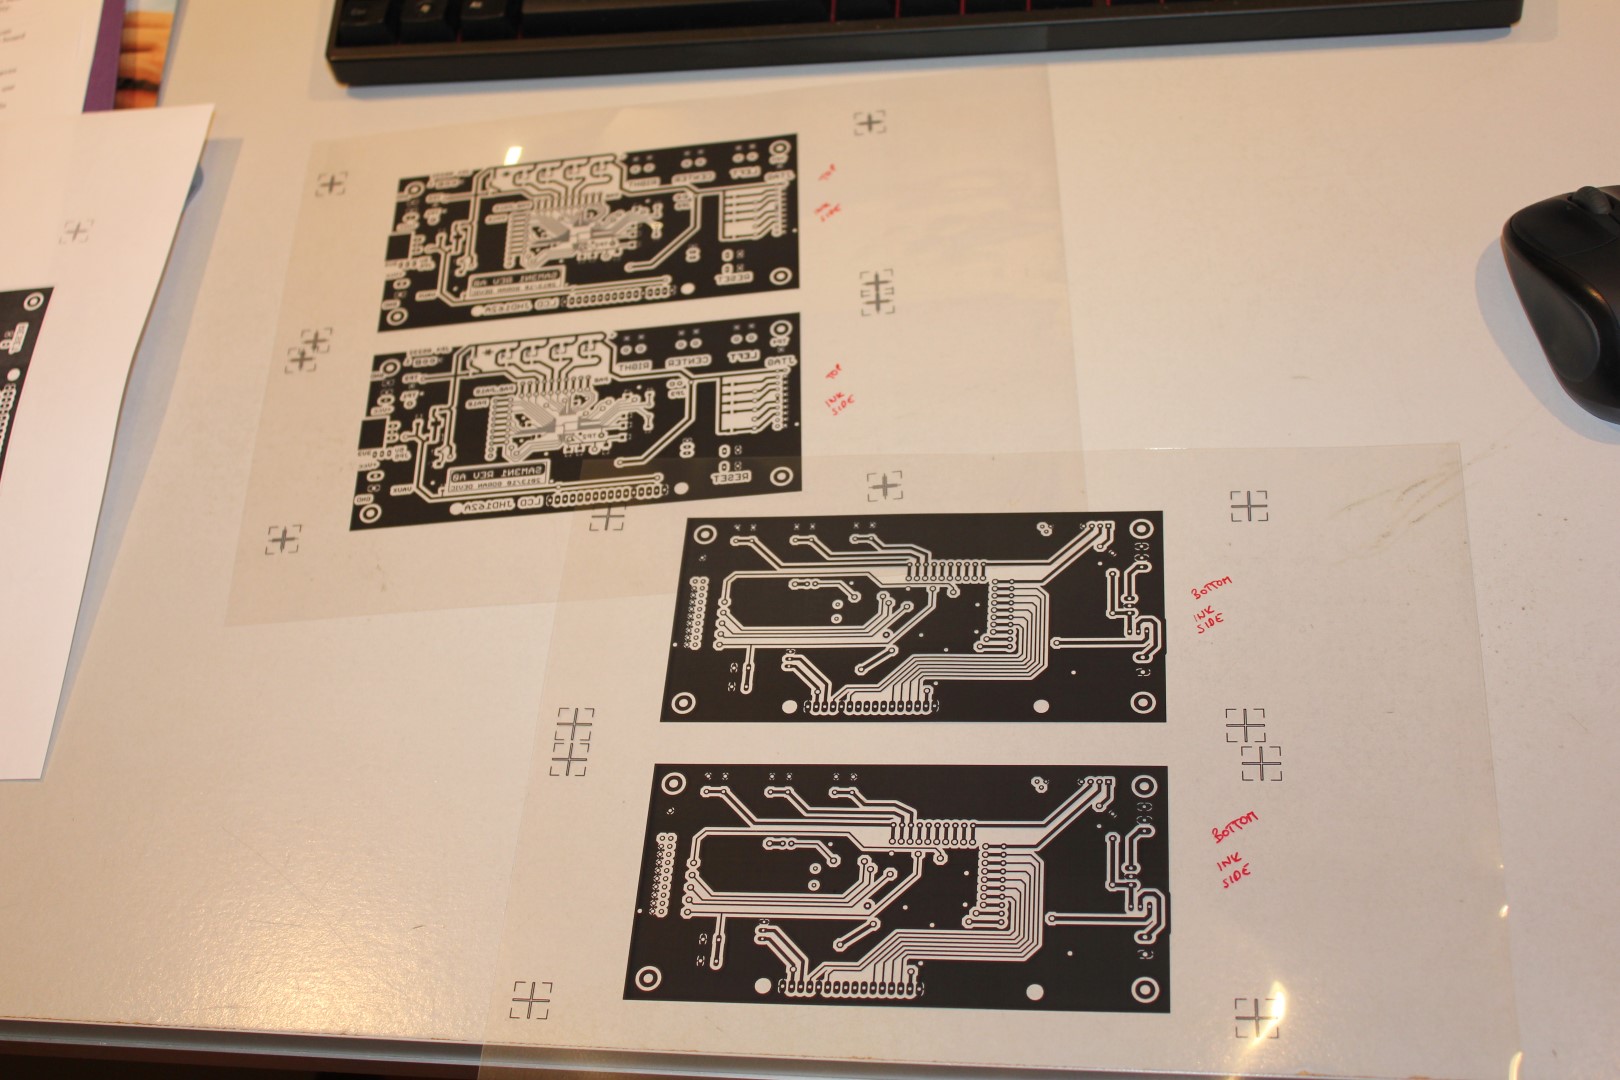
There is a lot of black to print, especially if you correctly did the ground pour. Laser printers may still leave some streaks and tiny gaps and they will cause holes in copper. To mitigate that problem, always make 2 identical prints and overly them using alignment marks. Once a pair of transparencies are nicely cut and aligned, tape them. From then on, they should not move (slip). This should produce a perfect black mask. This has worked perfectly for me and I never had artifacts in the copper due to a bad mask.
Therefore, for this board, I needed 4 prints: two for each side. The additional problem for dual-side boards will be the alignment: various holes and vias should match and not be off once a board has been drilled. I have added alignment marks on all 4 corners, about 2 inches away from the edges. Using those it was very easy to keep all layers aligned.
At this time, I align and tape two identical prints so they don’t slide.
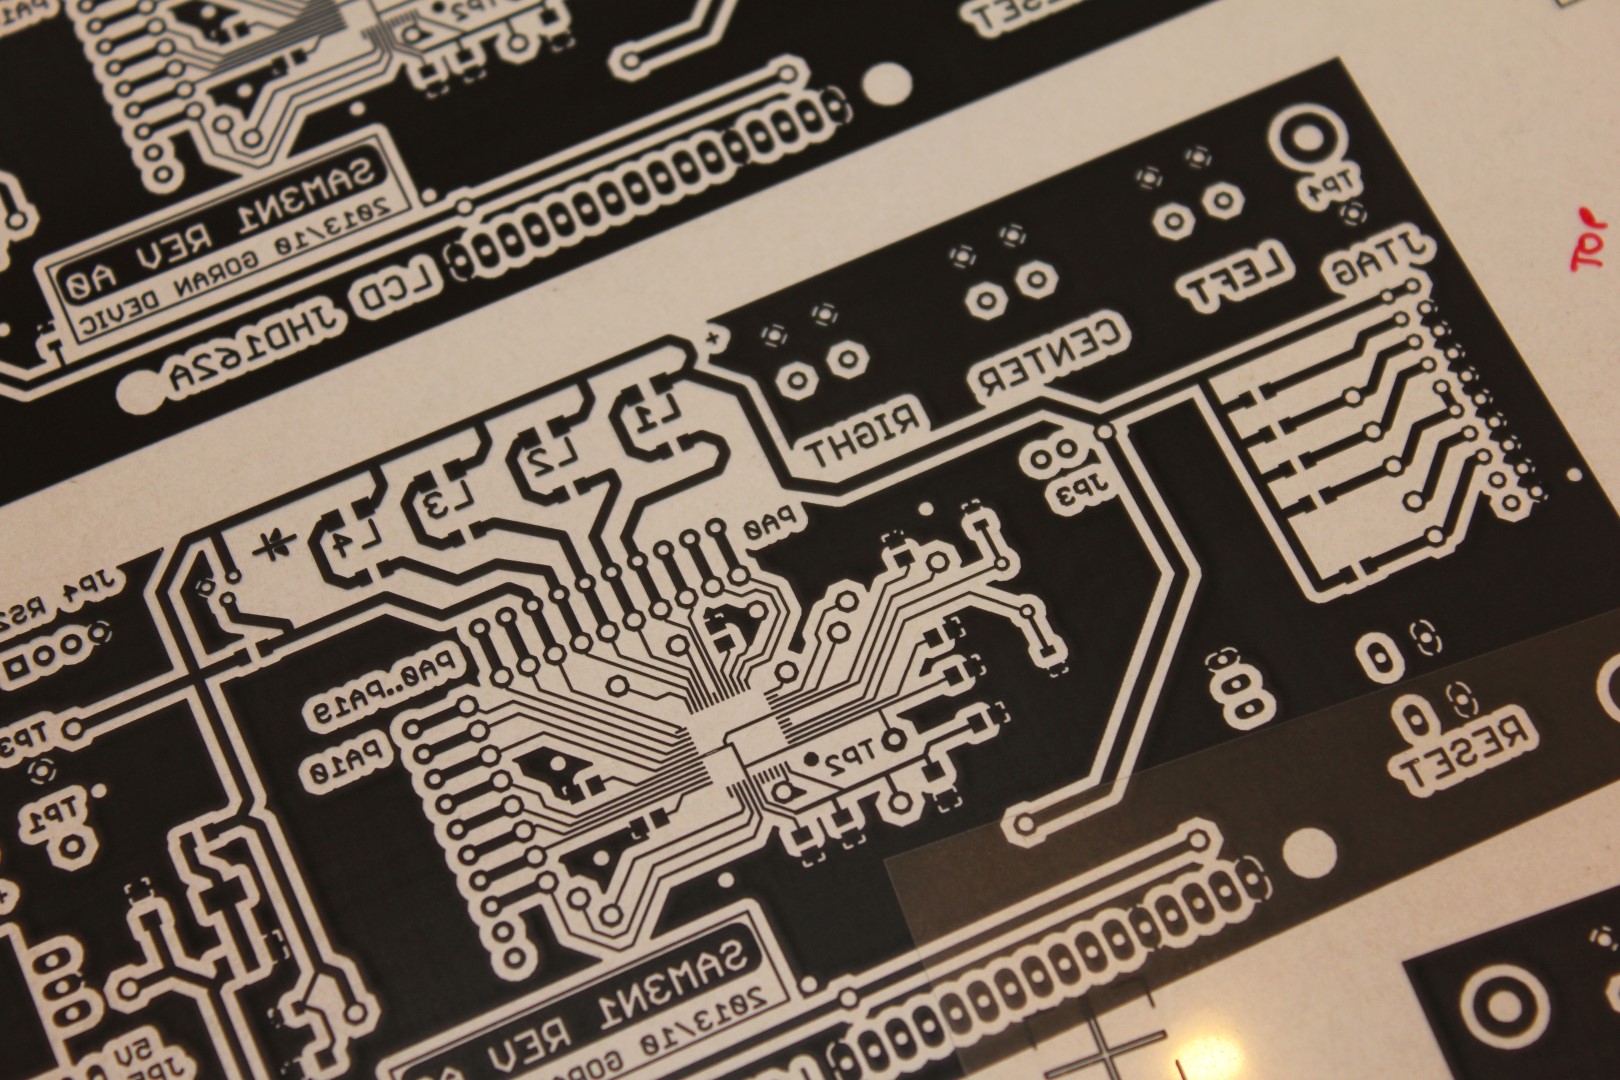
Handle mask with care; hold it by the edges only. You don’t want any fingerprints on it.
Tools: Laser printer, transparency for laser printers, double-sided and regular (scotch) tape
Way cool! Some extremely valid points! I appreciate you writing this write-up and the rest of the website is extremely good.