


When printing from Eagle (a PCB CAD software), you can print only one layout per page. Usually, I need two since when I print to transparency, I like to overlap two identical images to get a better “black” for photo-etching.
Using this method I can compose several layouts into a single page to be printed. This also results in less waste.
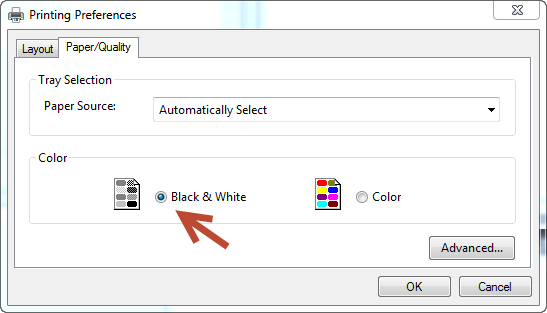
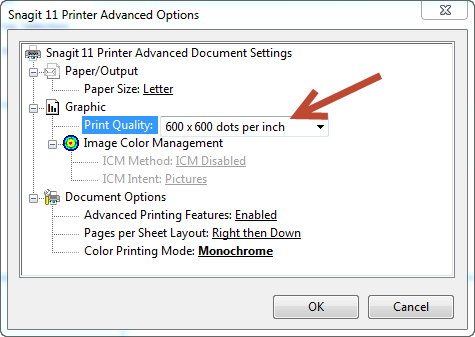
SnagIt is a screen capture software. It can do much more: it also installs a virtual printer. I print into SnagIt virtual printer from within Eagle. The properties of SnagIt printer should be set to this:
Black & White; Advanced=>600 dpi
Print from Eagle each of the layers and capture them with SnagIt as images. These images tend to be large, so crop them and save them within SnagIt:
View=>20%
Draw=>select actual part of the layout; Image=>Crop
Save As=>*.gif
Do this for every layout of any board.
Open Gimp and create an empty image. Set the size to be less than a letter-size (important!) as shown below. Set 600dpi and grayscale:
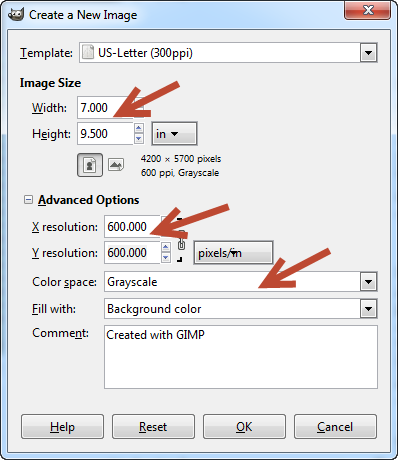
Note the size adjusted from 8.5″x11″ down to 7″x9.5″. I’ve found that empirically, by trial-and-error, to be roughly the size at which point the image will not tend to shrink when sent to a printer. The shrink happens due to printer margins that are taken into account.
Insert each board layout image as a layer:
File=>Open as layers…
and arrange them with a page.
Now you can send it to a printer, possibly to print onto transparency.
Check the dimensions against a test print from Eagle.